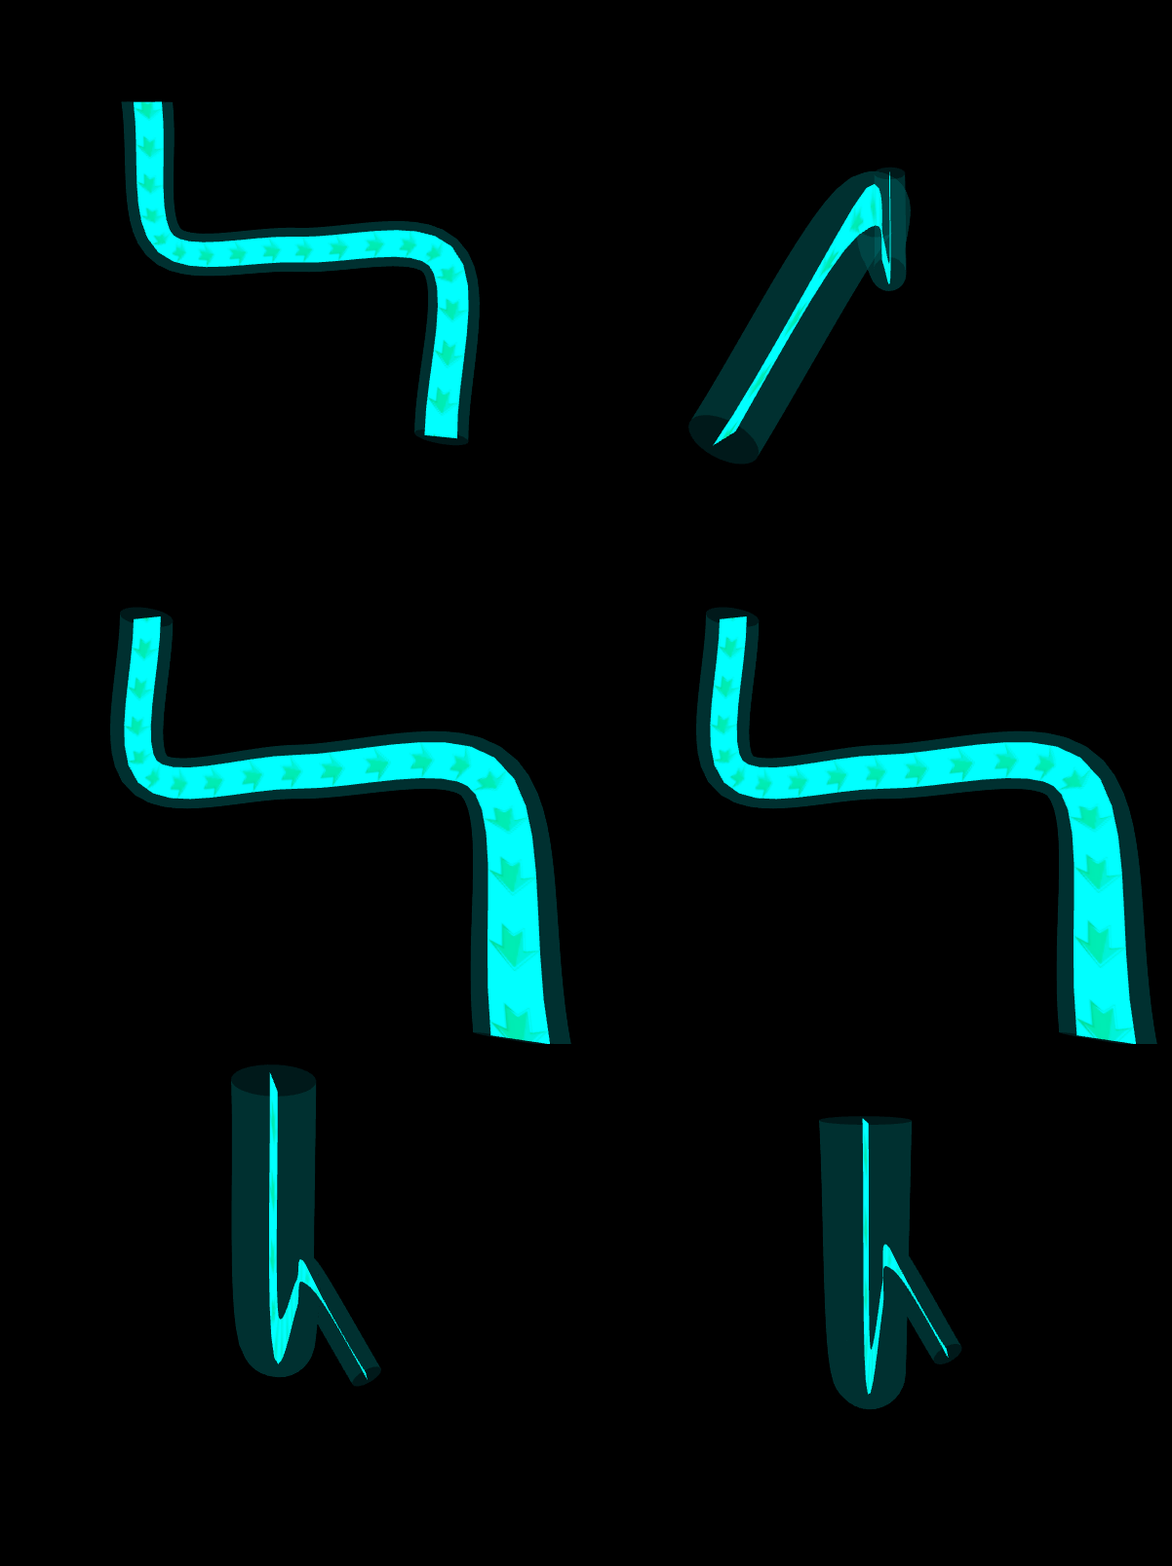
一、流水管线

实现逻辑:
1)先自定义几个点,通过CatmullRomCurve3生成一条平滑曲线
2)根据生成的曲线在XY面扩展一个面,其中需要注意顶点索引、UV坐标添加的顺序,否则可能会导致绘制的图片混乱,不是完整的图片
3)添加纹理同时设置偏移量实现流动效果
4)为了保证显示的箭头图标不失真,根据管线的长度和图标的长度动态计算repeat的个数


- function addFlowByGeometry() {
- // 自定义点
- const points = [
- new THREE.Vector3(-5, 5, 0),
- new THREE.Vector3(-5, 0, 0),
- new THREE.Vector3(0, 0, 0),
- new THREE.Vector3(5, 0, 0),
- new THREE.Vector3(5, -5, 3),
- ];
- // 生成一条平滑的曲线
- const curve = new THREE.CatmullRomCurve3(points);
- const srcGeometry = new THREE.TubeGeometry(curve, 64, 0.8, 32, false);
- const srcMaterial = new THREE.MeshBasicMaterial({
- color: 0x00ffff,
- transparent: true,
- opacity: 0.1,
- side: THREE.DoubleSide // 两面都显示
- });
- const srcMesh = new THREE.Mesh(srcGeometry, srcMaterial);
- scene.add(srcMesh);
- // 定义曲面的分辨率
- const widthSegments = 32;
- const heightSegments = 32;
- // 定义顶点位置和纹理坐标
- const vertices = [];
- const uvs = [];
- // 定义扩展宽度
- const width = 0.5;
- for (let y = 0; y <= heightSegments; y++) {
- for (let x = 0; x <= widthSegments; x++) {
- const u = x / widthSegments;
- const v = y / heightSegments;
- // 获取曲线上的点
- const point = curve.getPoint(u);
- // 获取曲线的切线向量
- const tangent = curve.getTangent(u);
- // 计算法线向量
- const normal = new THREE.Vector3(-tangent.y, tangent.x, 0).normalize();
- // 扩展成平面
- const px = point.x + normal.x * (v * 2 - 1) * width;
- const py = point.y + normal.y * (v * 2 - 1) * width;
- const pz = point.z;
- vertices.push(px, py, pz);
- uvs.push(u, v);
- }
- }
- // 定义顶点索引
- const indices = [];
- for (let y = 0; y < heightSegments; y++) {
- for (let x = 0; x < widthSegments; x++) {
- const a = x + y * (widthSegments + 1);
- const b = x + 1 + y * (widthSegments + 1);
- const c = x + 1 + (y + 1) * (widthSegments + 1);
- const d = x + (y + 1) * (widthSegments + 1);
- indices.push(a, b, d);
- indices.push(b, c, d);
- }
- }
- // 创建一个自定义的 BufferGeometry
- const geometry = new THREE.BufferGeometry();
- // 将顶点位置添加到几何体
- geometry.setAttribute('position', new THREE.BufferAttribute(new Float32Array(vertices), 3));
- // 将顶点索引添加到几何体
- geometry.setIndex(new THREE.BufferAttribute(new Uint16Array(indices), 1));
- // 将纹理坐标添加到几何体
- geometry.setAttribute('uv', new THREE.BufferAttribute(new Float32Array(uvs), 2));
- // 创建纹理加载器
- const textureLoader = new THREE.TextureLoader();
- // 加载纹理
- const texture = textureLoader.load('Objects/imgs/arrow.png', () => {
- texture.wrapS = THREE.RepeatWrapping;
- texture.wrapT = THREE.RepeatWrapping;
-
- const originalWidth = texture.image.width;
- const originalHeight = texture.image.height;
- // 创建平面几何体
- const [allWidth, allHeight] = [curve.getLength(), 1];
- // 更新几何体的尺寸
- texture.repeat.set(allWidth / (originalWidth * allHeight / 2 / originalHeight), 1);
- // 创建材质
- const material = new THREE.MeshBasicMaterial({ map: texture, side: THREE.DoubleSide, color: 0x00ffff, wireframe: false });
- // 创建网格
- const mesh = new THREE.Mesh(geometry, material);
- // 将网格添加到场景中
- scene.add(mesh);
- });
- setInterval(() => {
- texture.offset.x -= 0.04;
- }, 30)
- }
来源:程序园用户自行投稿发布,如果侵权,请联系站长删除
免责声明:如果侵犯了您的权益,请联系站长,我们会及时删除侵权内容,谢谢合作! |