一. 环境要求
- JDK 8 / 17
- SpringBoot 2.x / 3.x
- Forest 1.6.4+
- Fastjson2
依赖配置
除了 SpringBoot 和 Lombok 等基础框架之外,再加上 Forest 和 Fastjson2 的依赖- <dependency>
- <groupId>com.dtflys.forest</groupId>
- forest-spring-boot-starter</artifactId>
- <version>1.6.4</version>
- </dependency>
- <dependency>
- <groupId>com.alibaba</groupId>
- fastjson</artifactId>
- <version>2.0.53</version>
- </dependency>
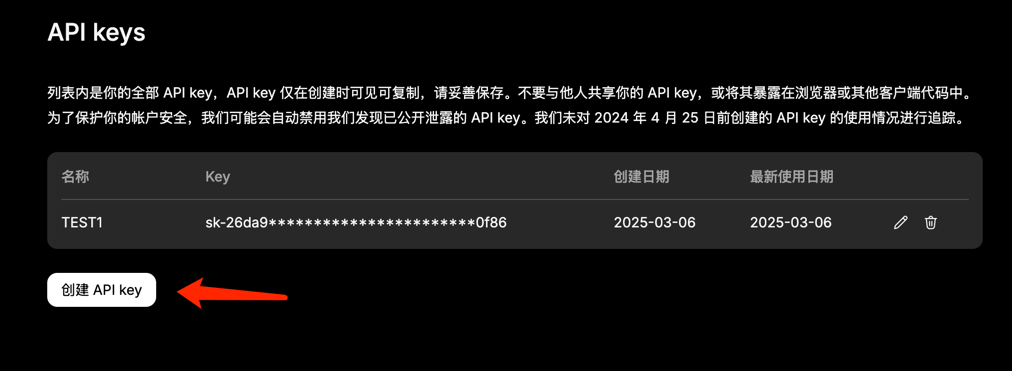
打开 DeepSeek 官网,进入到 API Key 的管理页面(DeepSeek),就能找到您的 API Key。
如果还没有 KEY,可以点击页面下方的创建API Key按钮
创建完之后,会弹出一个对话框告诉您新生成的 API Key 字符串,然后要及时把它复制下来保存到一个安全的地方。
三. 配置项目
进入 SpringBoot 的配置文件application.yml,加入以下代码:- # Forest 框架配置
- forest:
- connect-timeout: 10000 # 请求连接超时时间
- read-timeout: 3600000 # 请求数据读取超时时间,越长越好
- variables:
- apiKey: YOUR_API_KEY # 替换为您申请到的 API Key
- model: deepseek-reasoner # DeepSeek 支持的模型,R1 模型
Forest 支持以声名式的方式发送 HTTP 请求,以下代码就是将 DeepSeek API 请求以声名式接口的方式进行定义- public interface DeepSeek {
-
- @Post(
- url = "https://api.deepseek.com/chat/completions",
- contentType = "application/json",
- headers = "Authorization: Bearer {apiKey}",
- data = "{"messages":[{"content":"{content}","role":"user"}],"model":"{model}","stream":true}")
- ForestSSE completions(@Var("content") String content);
- }
其中 {apiKey} 和 {model} 的意思为读取配置文件中的 apiKey 字段,{content} 则是读取 @Var("content") 注解修饰的参数。 并且请求体数据为官网文档提供的 JSON 字符串,然后通过{变量名}这种字符串模板占位符的形式拼接出您想要的参数。
接口方法的返回类型为ForestSSE,这是 Forest 框架提供的内置类型,主要用于接受和处理 SSE 事件流消息。
五. 调用接口
在声名式接口创建完之后,可以通过 Spring 的@Resouce注解将此接口实例注入到启动类中,Forest框架会利用动态代理模式自动生成相应的接口代理类实例,并将其自动注入到您所需要调用的类中。- @Resource
- private DeepSeek deepSeek;
- @SpringBootApplication
- public class DeepSeekExampleApplication implements CommandLineRunner {
- // DeepSeek 声名式接口
- @Resource
- private DeepSeek deepSeek;
- @Override
- public void run(String... args) {
- // 调用声明式接口方法
- deepSeek.completions("你好,你是谁?")
- .setOnMessage(event -> {
- // 接受和处理 SSE 事件
- try {
- // 获取消息数据,并反序列化为 DeepSeekResult 类
- DeepSeekResult result = event.value(DeepSeekResult.class);
- // 打印 DeepSeekResult 对象中的消息内容
- System.out.print(result.content());
- } catch (Exception e) {
- }
- })
- .listen(SSELinesMode.SINGLE_LINE); // 监听 SSE,并设置为单行消息模式
- }
- public static void main(String[] args) {
- try {
- SpringApplication.run(DeepSeekExampleApplication.class, args);
- } catch (Throwable th) {
- th.printStackTrace();
- }
- }
- }

其中,DeepSeekResult 是根据返回的消息格式定义的数据类,具体代码如下- @Data
- public class DeepSeekResult {
- private String id;
- private String object;
- private Integer created;
- private String model;
- @JSONField(name = "system_fingerprint")
- private String systemFingerprint;
- private List<JSONObject> choices;
- // 获取消息中的 choices[0].delta.content
- public String content() {
- List<JSONObject> choices = getChoices();
- if (CollectionUtil.isNotEmpty(choices)) {
- JSONObject chooseJson = choices.get(0);
- DeepSeekResultChoice choice = chooseJson.toJavaObject(DeepSeekResultChoice.class);
- return choice.getDelta().getContent();
- }
- return "";
- }
- }
六. 应答测试
调用方法写完之后,我们就可以跑一下代码看看了,点击 Run 之后可以看到控制台日志会打印以下内容
日志上半部分POST https://api.deepseek.com/chat/completions HTTPS [SSE]这类信息为 Forest 的请求日志,会告诉您发出去的 HTTP 请求信息中有些什么数据和参数。
而下半部分 “您好!我是由中国的深度求索(DeepSeek)公司开发的智能助手DeepSeek-R1...” 自然就是 DeepSeek 的回答了。
七. 思维链
以上的代码案例,只会返回 DeepSeek 的回答内容,不包含他的思考过程,拿怕模型是DeepSeek-R1也一样。如果要打印出思维链,就要修改一下代码
首先要修改 DeepSeekResult 类中的 content() 方法- @Data
- public class DeepSeekResult {
- private String id;
- private String object;
- private Integer created;
- private String model;
- @JSONField(name = "system_fingerprint")
- private String systemFingerprint;
- private List<JSONObject> choices;
- // 获取消息中的 choices[0].delta.reasoning_content
- // 或 choices[0].delta.content
- // 是否为思维内容,通过 DeepSeekContent.isReasoning 来标识
- public DeepSeekContent content() {
- List<JSONObject> choices = getChoices();
- if (CollectionUtil.isNotEmpty(choices)) {
- JSONObject chooseJson = choices.get(0);
- DeepSeekResultChoice choice = chooseJson.toJavaObject(DeepSeekResultChoice.class);
- String reasoningContent = choice.getDelta().getReasoningContent();
- // 判断是否存在 reasoningContent,存在就是思维链内容,否则就是存粹的回答内容
- if (StringUtils.isNotEmpty(reasoningContent)) {
- return new DeepSeekContent(true, reasoningContent);
- }
- return new DeepSeekContent(false, choice.getDelta().getContent());
- }
- return new DeepSeekContent();
- }
- }

添加 DeepSeekContent 类- @Data
- public class DeepSeekContent {
- // 是否为思考过程内容
- private boolean reasoning = false;
- // DeepSeek 回答的具体内容
- private String content = "";
- public DeepSeekContent() {
- }
- public DeepSeekContent(boolean reasoning, String content) {
- this.reasoning = reasoning;
- this.content = content;
- }
- }

最后,修改接口的调用部分- @SpringBootApplication
- public class DeepSeekExampleApplication implements CommandLineRunner {
- // DeepSeek 声名式接口
- @Resource
- private DeepSeek deepSeek;
- @Override
- public void run(String... args) {
- // 标志位:是否为第一次接收到到思维链内容
- AtomicBoolean isFirstReasoning = new AtomicBoolean(false);
- // 调用声明式接口方法
- deepSeek.completions("1+1等于几?")
- .setOnMessage(event -> {
- try {
- DeepSeekResult result = event.value(DeepSeekResult.class);
- DeepSeekContent content = result.content();
- // 通过 CAS 判断是否第一次接收到到思维链内容
- // 如果是,则打印出<思维链>标签
- if (content.isReasoning() && isFirstReasoning.compareAndSet(false, true)) {
- System.out.println("<思维链>");
- System.out.print(content.getContent());
- } else if (!content.isReasoning() && isFirstReasoning.compareAndSet(true, false)) {
- // 当 isFirstReasoning 由 true 转为 false
- // 则表明消息从思维链内容转向正式回答内容
- System.out.print(content.getContent());
- System.out.println("\n</思维链>\n");
- } else {
- // 打印正常的思维链或正式回答内容
- System.out.print(Opt.ofBlankAble(content.getContent()).orElse(""));
- }
- } catch (Exception e) {
- }
- })
- .listen(SSELinesMode.SINGLE_LINE);
- }
- public static void main(String[] args) {
- try {
- SpringApplication.run(DeepSeekExampleApplication.class, args);
- } catch (Throwable th) {
- th.printStackTrace();
- }
- }
- }

八. 思维链消息测试
接下来就可以运行程序测试了,看看日志中是否包含了思维链的过程
从日志中可以看出,程序正常运行了,其中被包裹在和标签中间的部分就是 DeepSeek 告诉我们的思维过程。 而在结束标签之后的文字就是他的正式回答内容。
九. 错误处理
本文案例调用的是 DeepSeek 官方的 API。由于众所周知的原因,调用接口时极有可能发生401等网络错误。
遇到这种请求,加一个拦截器就完事了- // Forest 的 SSE 请求拦截器
- public class DeepSeekInterceptor implements SSEInterceptor {
- // 接受到请求响应时会自动调用该方法
- @Override
- public ResponseResult onResponse(ForestRequest request, ForestResponse response) {
- // 判断请求是否发生错误,如 401、404 等等
- if (response.isError()) {
- // 如有错,就打印“服务端繁忙,请稍后再试”
- System.out.println("服务端繁忙,请稍后再试");
- return success();
- }
- return proceed();
- }
- }
- // 为整个接口绑定拦截器@BaseRequest(interceptor = DeepSeekInterceptor.class)public interface DeepSeek {
-
- @Post(
- url = "https://api.deepseek.com/chat/completions",
- contentType = "application/json",
- headers = "Authorization: Bearer {apiKey}",
- data = "{"messages":[{"content":"{content}","role":"user"}],"model":"{model}","stream":true}")
- ForestSSE completions(@Var("content") String content);
- }
可以看到,通过 Forest 这种声名式的形式来对接 DeepSeek API,相比于 OkHttp 和 HttpClient 有很多明显的好处。除了代码简洁,容易实现之外,更重要的是声名式代码天然更容易解耦。文本代码很自然的就实现了在参数配置、HTTP请求参数、以及接口调用的业务逻辑之间实现了代码解耦。如果要修改 API Key 或者模型,直接该配置文件就行。如果要修改 HTTP 的 URL 或参数,可以直接改声名式接口,而不会影响到调用接口的业务代码。而且可以很自然地将 DeepSeek API 的 HTTP 代码统一放到一个接口类中,方便管理,而且请求中的 URL、请求头、请求体参数都都一目了然。
代码仓库地址:forest: 声明式HTTP客户端API框架,让Java发送HTTP/HTTPS请求不再难。它比OkHttp和HttpClient更高层,是封装调用第三方restful api client接口的好帮手,是retrofit和feign之外另一个选择。通过在接口上声明注解的方式配置HTTP请求接口 - Gitee.com
来源:程序园用户自行投稿发布,如果侵权,请联系站长删除
免责声明:如果侵犯了您的权益,请联系站长,我们会及时删除侵权内容,谢谢合作! |


 提升卡
提升卡 置顶卡
置顶卡 沉默卡
沉默卡 喧嚣卡
喧嚣卡 变色卡
变色卡 千斤顶
千斤顶 照妖镜
照妖镜


