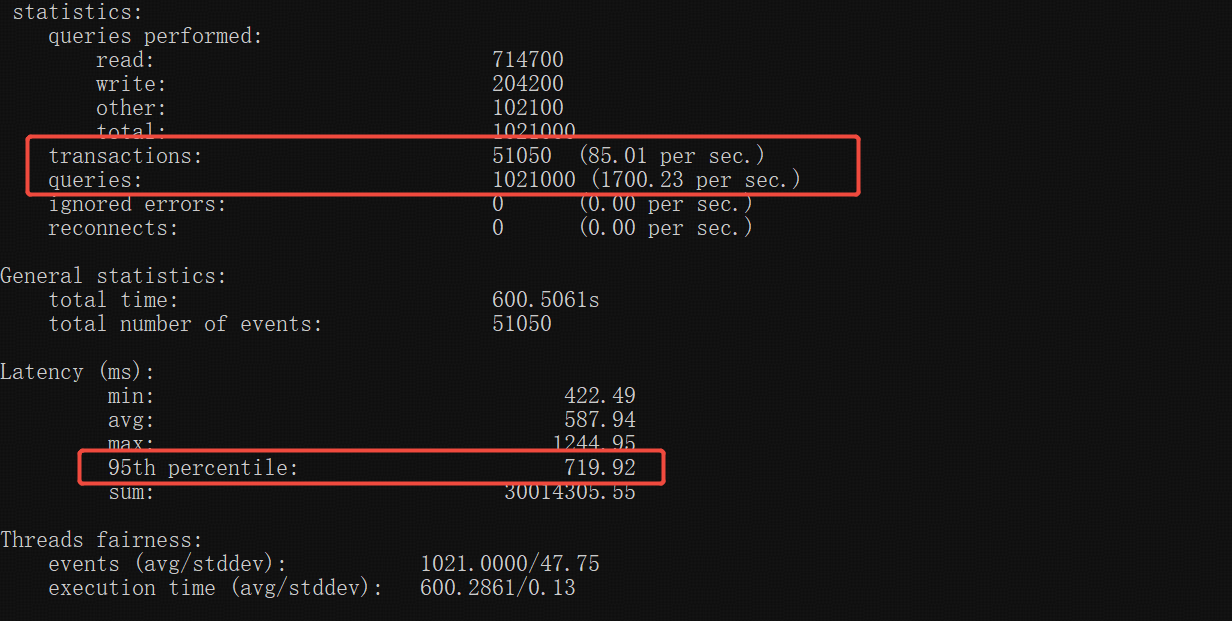
1. sysbench
https://github.com/akopytov/sysbench
在线安装- curl -s https://packagecloud.io/install/repositories/akopytov/sysbench/script.deb.sh | sudo bash
- sudo apt -y install sysbench
不会使用的话,直接敲 sysbench --help 或者 sysbench help
使用也非常简单,四个命令:prepare(准备)、run(运行)、cleanup(清理)、help(帮助)
先创建一个数据库,通常是叫“sbtest”- # 准备数据
- sysbench --mysql-host=172.16.192.114 --mysql-port=3306 --mysql-user=root --mysql-password='123456' --mysql-db=sbtest --db-driver=mysql --tables=10 --table-size=100000 --threads=4 /usr/share/sysbench/oltp_read_write.lua prepare
- # 运行
- sysbench --mysql-host=172.16.192.114 --mysql-port=3306 --mysql-user=root --mysql-password='123456' --mysql-db=sbtest --db-driver=mysql --tables=10 --table-size=100000 --report-interval=10 --threads=50 --time=600 /usr/share/sysbench/oltp_read_write.lua run
- # 清理数据
- sysbench --mysql-host=172.16.192.114 --mysql-port=3306 --mysql-user=root --mysql-password='123456' --mysql-db=sbtest --db-driver=mysql --tables=10 --table-size=100000 --report-interval=10 --threads=50 --time=600 /usr/share/sysbench/oltp_read_write.lua cleanup

参考
https://help.aliyun.com/zh/polardb/polardb-for-xscale/sysbench-test-standard-version
https://piaohua.github.io/post/mysql/20200808-mysql-sysbench/
https://www.cnblogs.com/dclogs/p/18620522
2. BenchmarkSQL
https://www.tpc.org/
https://github.com/pingcap/benchmarksql
https://github.com/Percona-Lab/tpcc-mysql
首先从github上下载源码,然后编译打包
要确保测试机上安装了JDK,至少是JDK7以上的版本,并且正确设置了 JAVA_HOME 和 PATH 环境变量
解压缩以后,进入benchmarksql主目录,执行 ant 命令,编译打包后会多出一个dist目录来

源码主目录中有个 HOW-TO-RUN.txt 文件,可以按这个文件中的步骤来
首先,还是创建一个测试数据库,通常叫“tpcc”
进入 run 目录,编辑 props.mysql文件

- db=mysql
- driver=com.mysql.jdbc.Driver
- conn=jdbc:mysql://172.16.192.114:3306/tpcc?useSSL=false&useServerPrepStmts=true&useConfigs=maxPerformance&rewriteBatchedStatements=true&cachePrepStmts=true&prepStmtCacheSize=1000&prepStmtCacheSqlLimit=2048
- user=root
- password=123456
- warehouses=2
- loadWorkers=4
- terminals=20
- //To run specified transactions per terminal- runMins must equal zero
- runTxnsPerTerminal=0
- //To run for specified minutes- runTxnsPerTerminal must equal zero
- runMins=10
- //Number of total transactions per minute
- limitTxnsPerMin=0
- //Set to true to run in 4.x compatible mode. Set to false to use the
- //entire configured database evenly.
- terminalWarehouseFixed=true
- //The following five values must add up to 100
- //The default percentages of 45, 43, 4, 4 & 4 match the TPC-C spec
- newOrderWeight=45
- paymentWeight=43
- orderStatusWeight=4
- deliveryWeight=4
- stockLevelWeight=4
- // Directory name to create for collecting detailed result data.
- // Comment this out to suppress.
- resultDirectory=my_result_%tY-%tm-%td_%tH%tM%tS
- //osCollectorScript=./misc/os_collector_linux.py
- //osCollectorInterval=1
- //osCollectorSSHAddr=user@dbhost
- //osCollectorDevices=net_eth0 blk_sda
terminals 并发数
warehouses 越大数据量越大
runMins 运行时间
进入run目录直接执行命令- # 准备数据
- ./runDatabaseBuild.sh props.mysql
- # 运行
- ./runBenchmark.sh props.mysql
- # 清理数据
- ./runDatabaseDestroy.sh props.mysql
- # 生成报告
- ./generateReport.sh my_result_2025-xx-xx_xxxxx/
参考
https://help.aliyun.com/zh/polardb/polardb-for-xscale/tpc-c-test
https://www.cnblogs.com/hunterhuang8888/p/14237903.html
来源:程序园用户自行投稿发布,如果侵权,请联系站长删除
免责声明:如果侵犯了您的权益,请联系站长,我们会及时删除侵权内容,谢谢合作! |